Replace Ninebot ESX Kickstand: Difference between revisions
Jump to navigation
Jump to search
No edit summary |
No edit summary |
||
| (One intermediate revision by the same user not shown) | |||
| Line 1: | Line 1: | ||
This page covers how to replace the kickstand on the | This page covers how to replace the kickstand on the {{Ninebot ESX Series}} scooters. | ||
==Removing the Old Kickstand== | ==Removing the Old Kickstand== | ||
Latest revision as of 02:12, 12 August 2024
This page covers how to replace the kickstand on the Ninebot ESX (ES1, ES2, ES3, ES4) and SNSC 1.0/SNSC 1.1 scooters.
Removing the Old Kickstand
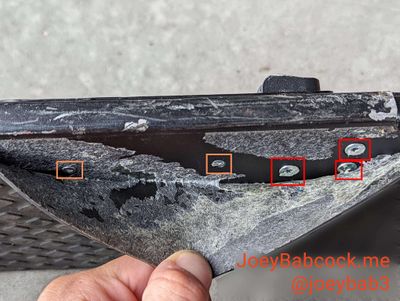
Carefully peel back the footmat making sure not to tear the rubber.

There are three hex/Allen M2.5/2.5mm machine screws holding the kickstand in place circled in red.
There are also two small self-tapping Phillips screws circled in orange.
Remove all of these and then carefully remove the old kickstand and kickstand well.
Securing the New Kickstand
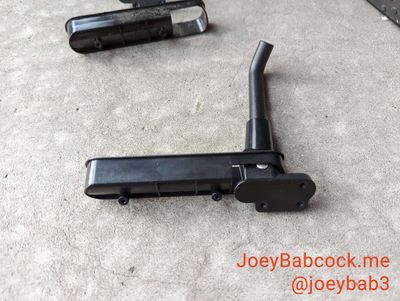
Thread the new kickstand through the hole in the well as shown below.

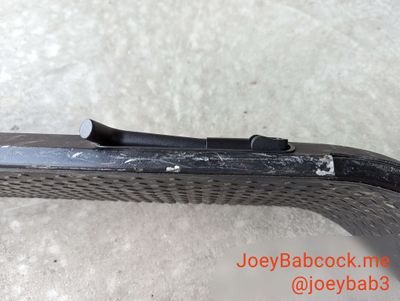
Slide the new kickstand and original or new well, into the hole.
Lightly insert two of the hex machine screws, then the two self-tapping Phillips screws then tighten all of them.
