Ninebot Max/G30 How to Upgrade Gen 1 Motor to Gen 2
April 4th, 2021
Early in 2020, Segway released a new version of the Ninebot Max/G30 motor that was able to go faster at the expense of lower torque.
Want to know more about the differences between the different generations? Check out the wiki entry for Ninebot Max Gen 1 vs Gen 2 Differences (gen 3 too I guess now).
FAQ
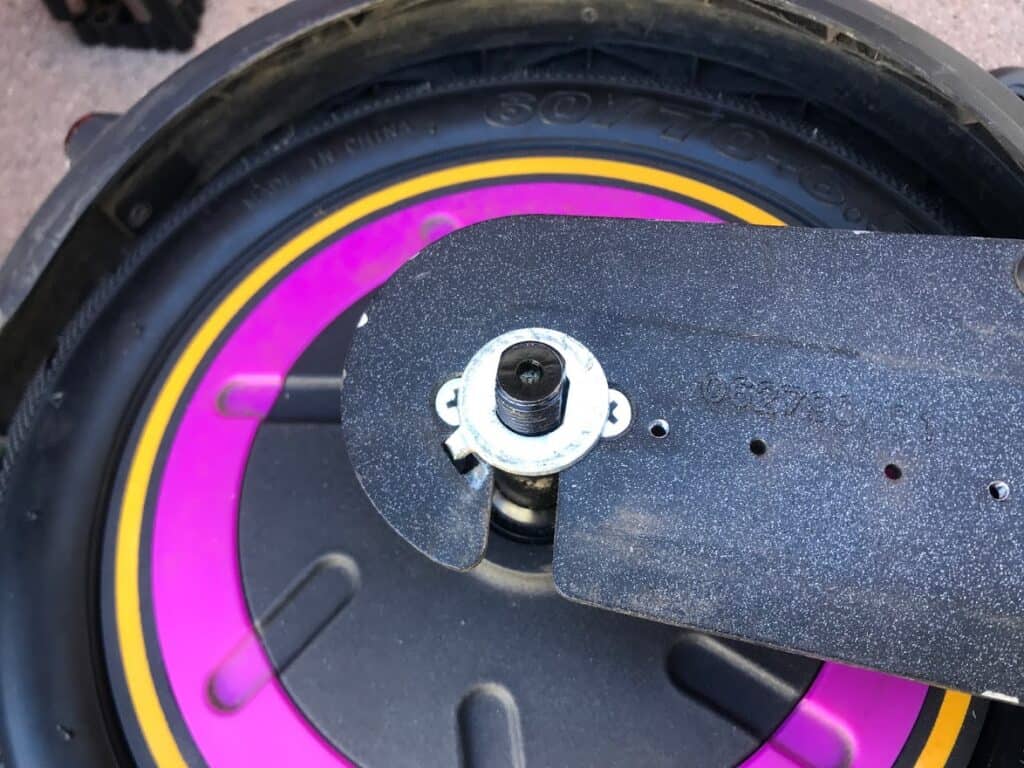
- How do you know which motor type you have?
Check the side of the wheel, there should be a qr code and a serial number.
Motors beginning with a serial number of ‘5’ or ‘6’ are the older generation or “Gen 1”.
The new generation motor, “Gen 2”, begins with a ‘9’.
- What’s the difference between a Gen 1 motor and a Gen 2 motor?
Older Gen 1 motors max out at around 30kmh/18.6mph, where the newer Gen 2 motors can max out upwards of 35kmh-40kmh(21-23mph).
These are their max speeds without hardware modifications, no amount of custom firmware will get your max/G30 to go faster than these speeds.
- So a Ninebot Max G30P II or G30D II or G30E II all have a gen 2 motor?
No, the Gen 2 of the scooter or the “II” after the model name is just denoting a cosmetic update.
Many European models will still come with the gen 1 motors to keep top speed lower.
Disassembly
*Note this was done on an SNSC (rental) version of the G30. You may have more or fewer screws depending on your specific model.
Starting with the bottom cover, remove the 18 Torx Security T15 screws.
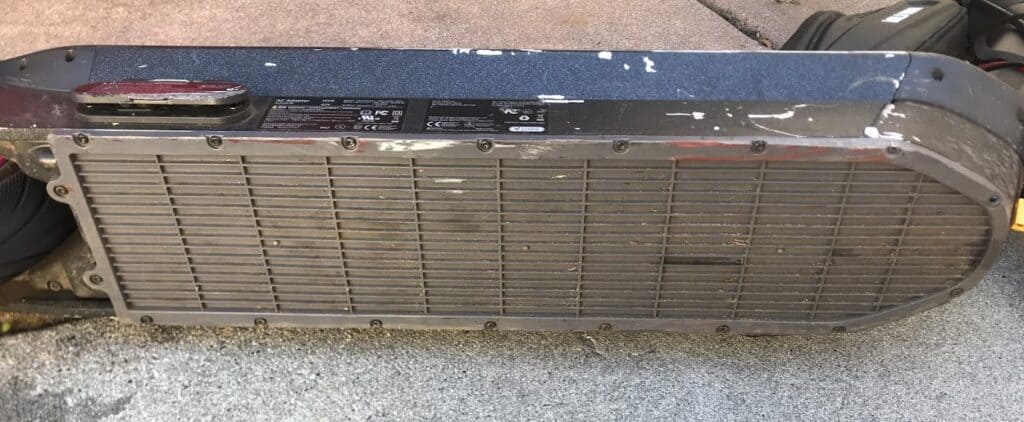
The bottom cover is held in place by 18 Torx Security T15 screws. They may be stripped or ground down if your scooter shows signs of wear.
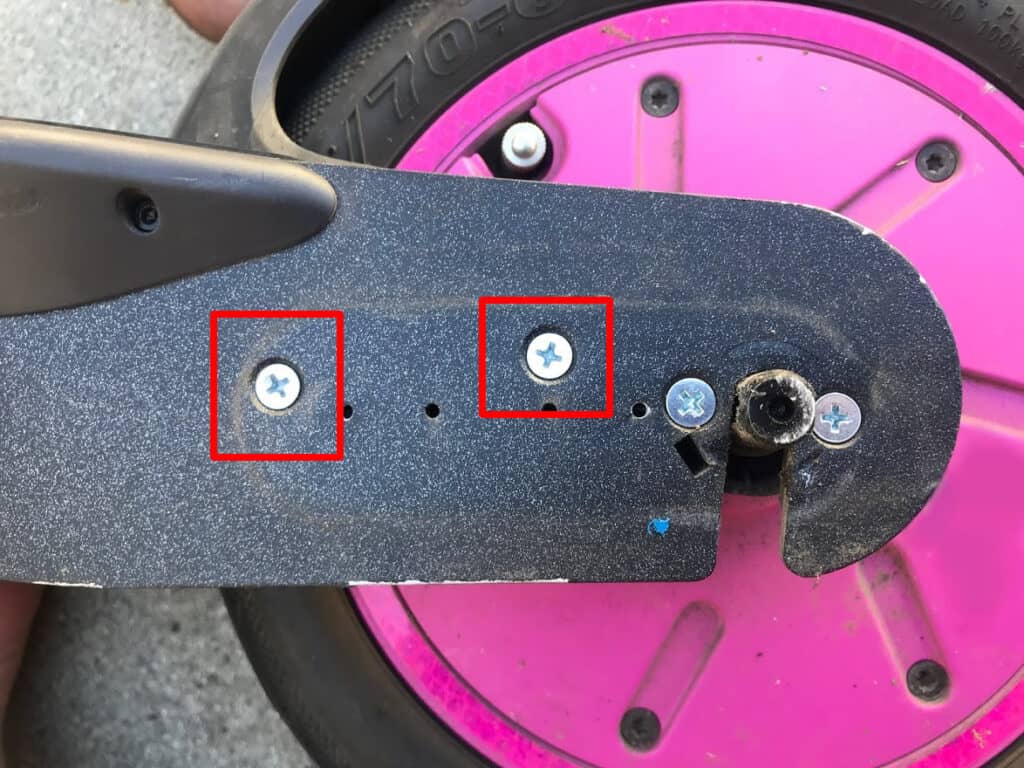
From here, on each side of the rear wheel are two M2.5/2.5mm Allen/hex screws that need to be removed.
You can attempt to peel back the reflector stickers if you don’t want to replace them but it is much easier to puncture them and replace them later.
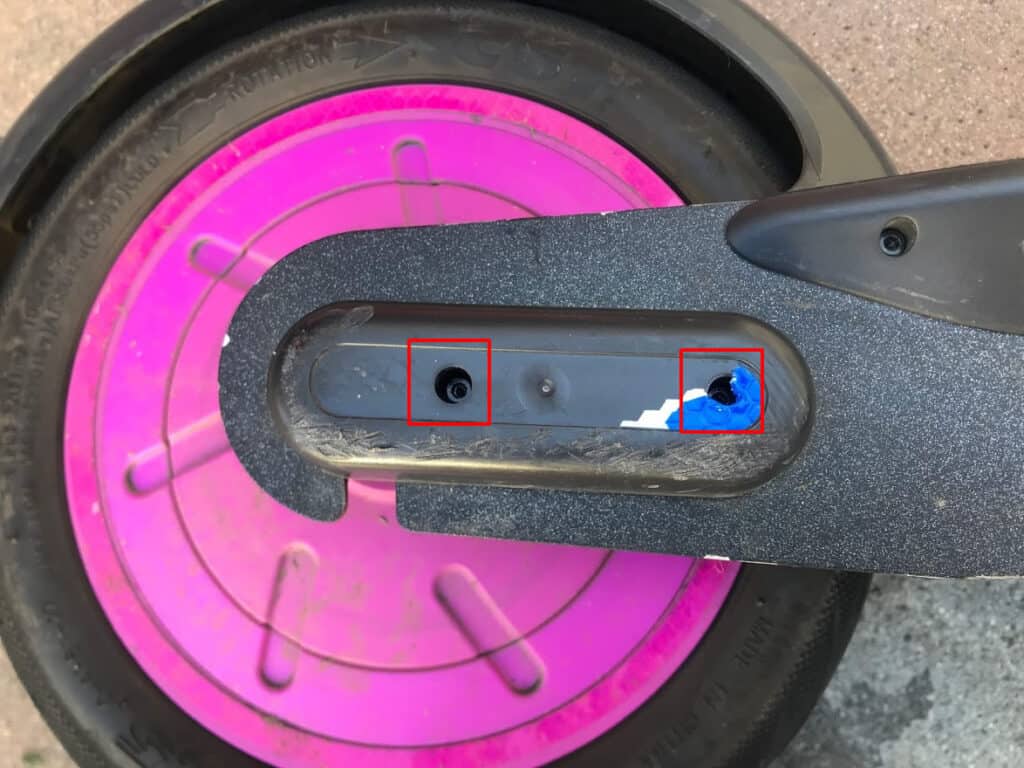
The 2 bolt guard screws are located behind the reflective stickers.
Removing the Bolt guard on both sides will reveal the two bolts.
Remove them with an adjustable wrench.
This will likely take a fair amount of torque, especially if you’ve never removed the wheel before.
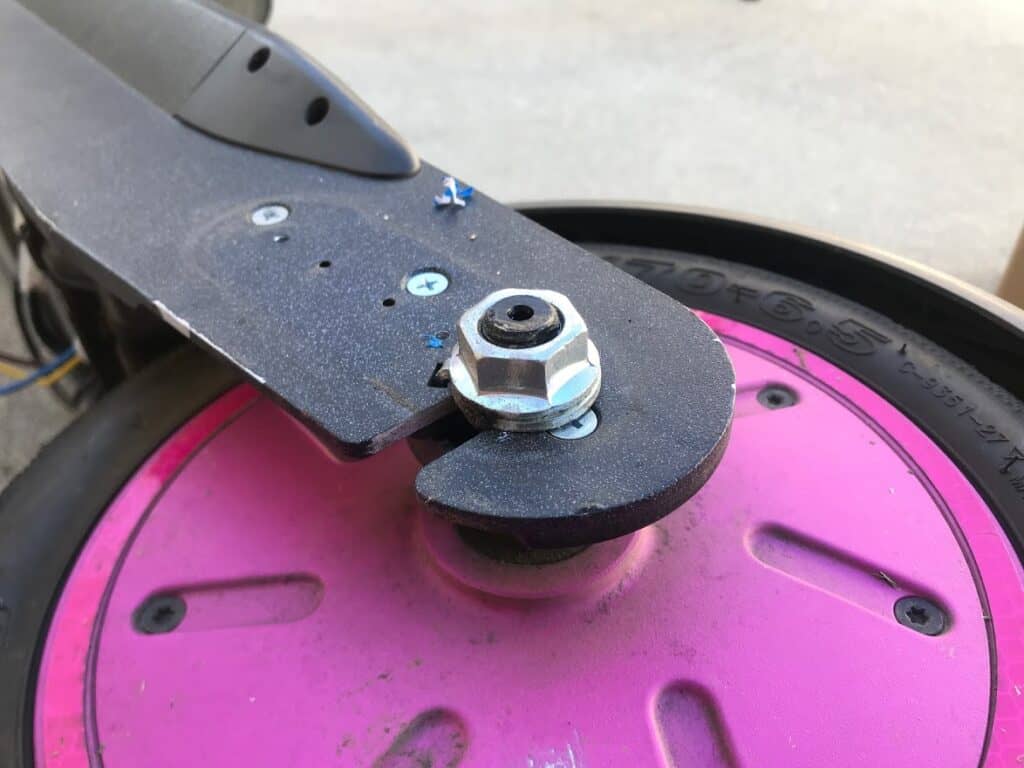
Remove both bolts before continuing.
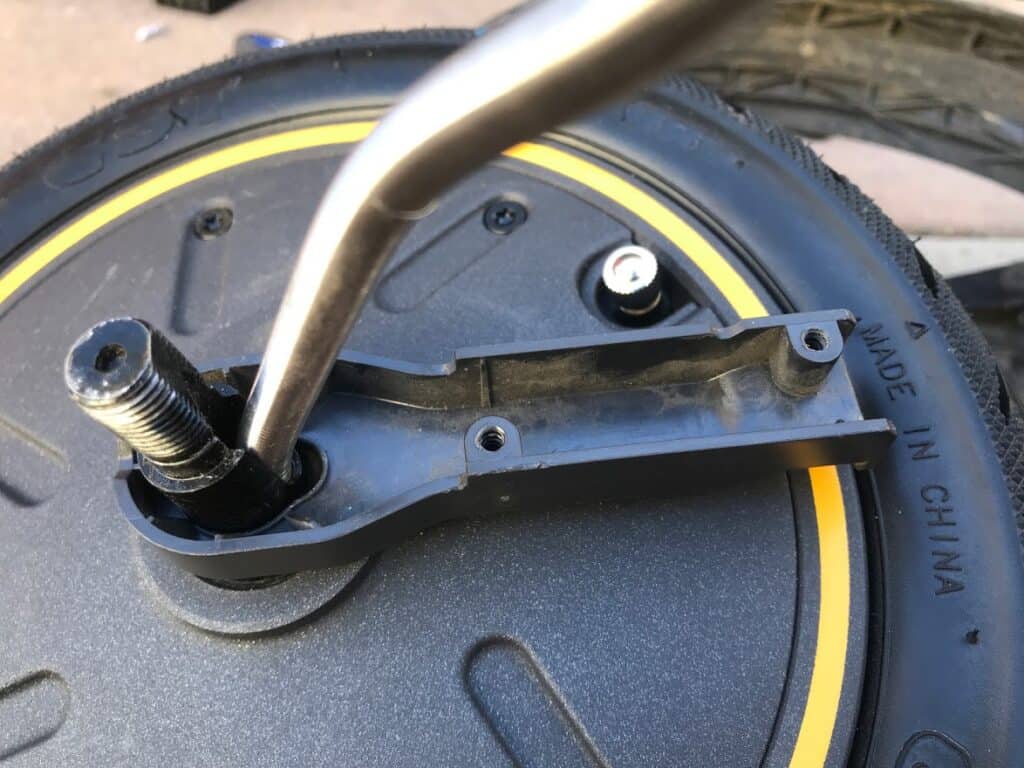
Remove the aluminum locking piece from the axle.
It may take a bit of force but it is not held in place by anything.
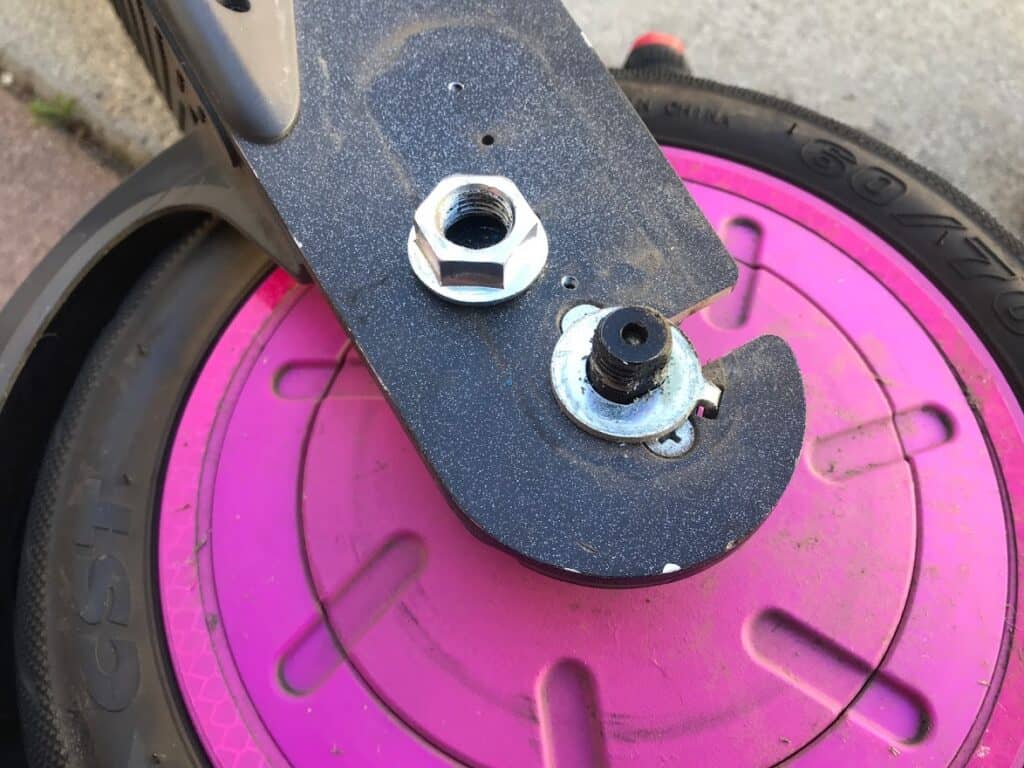
The Locking piece in place.
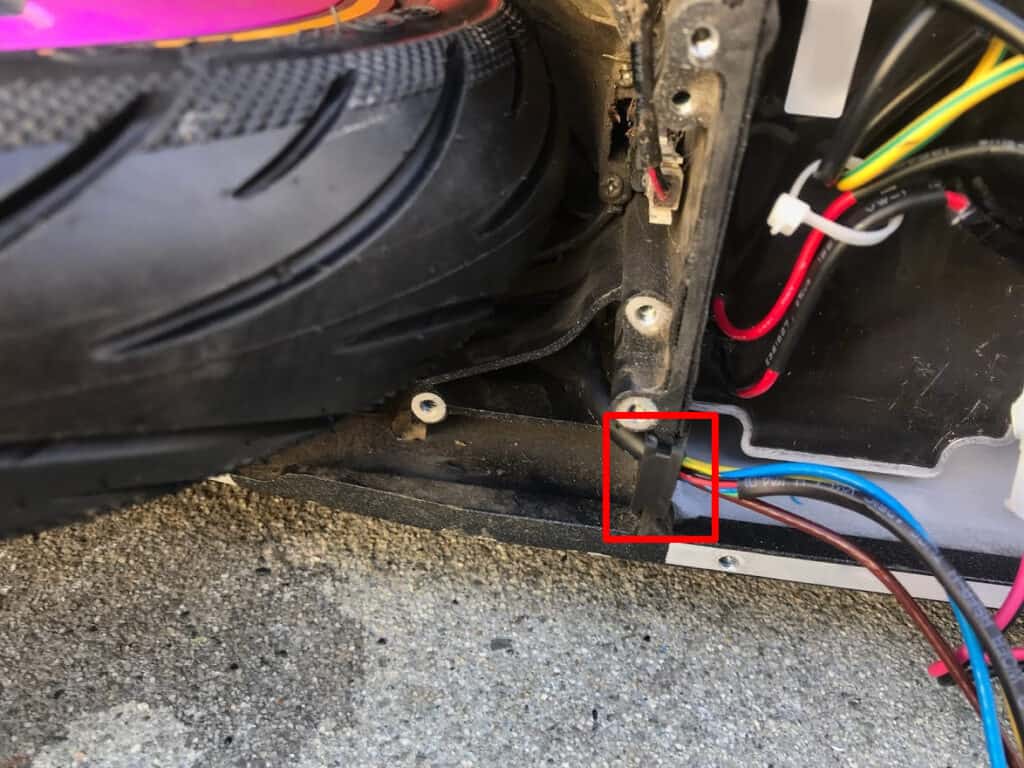
Once the bolts are removed, the two upper screws holding the motor wire guard in place can be removed.
These are not present in retail/folding versions of the scooter.
The two Philips wire guard screws
From here, 4 black Security Torx T25 screws hold in another plastic wireguard at the rear of the motor.
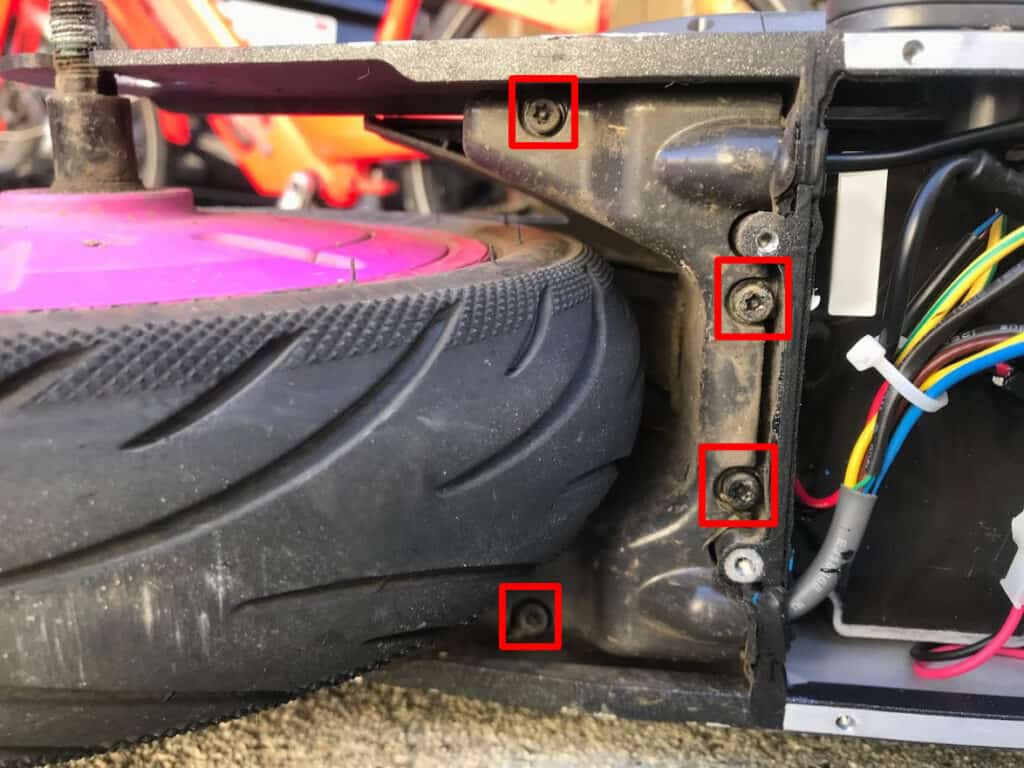
4 security screws holding in the wire guard.
Once you remove this cover, it’s time to remove the ESC/Motor Controller.
Two M3/3mm Allen/Hex screws hold it in place.
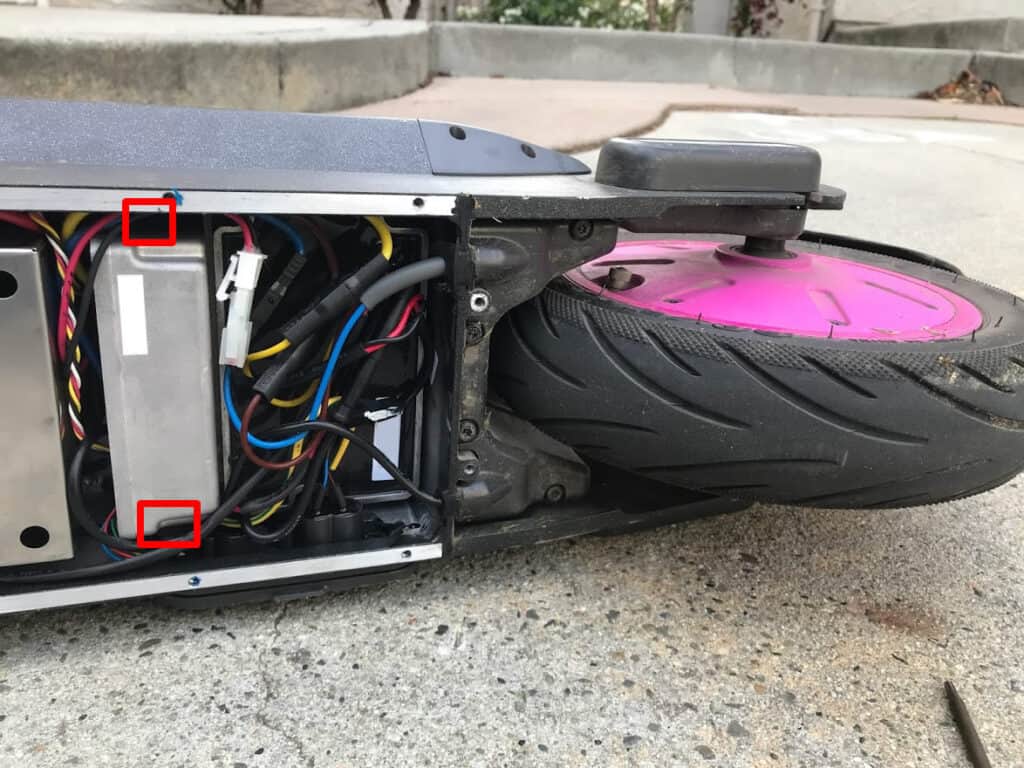
The location of the ESC screws.
Carefully unplug the 5 pin motor hall sensor wire from the ESC, as well as the 3 thick phase cables.
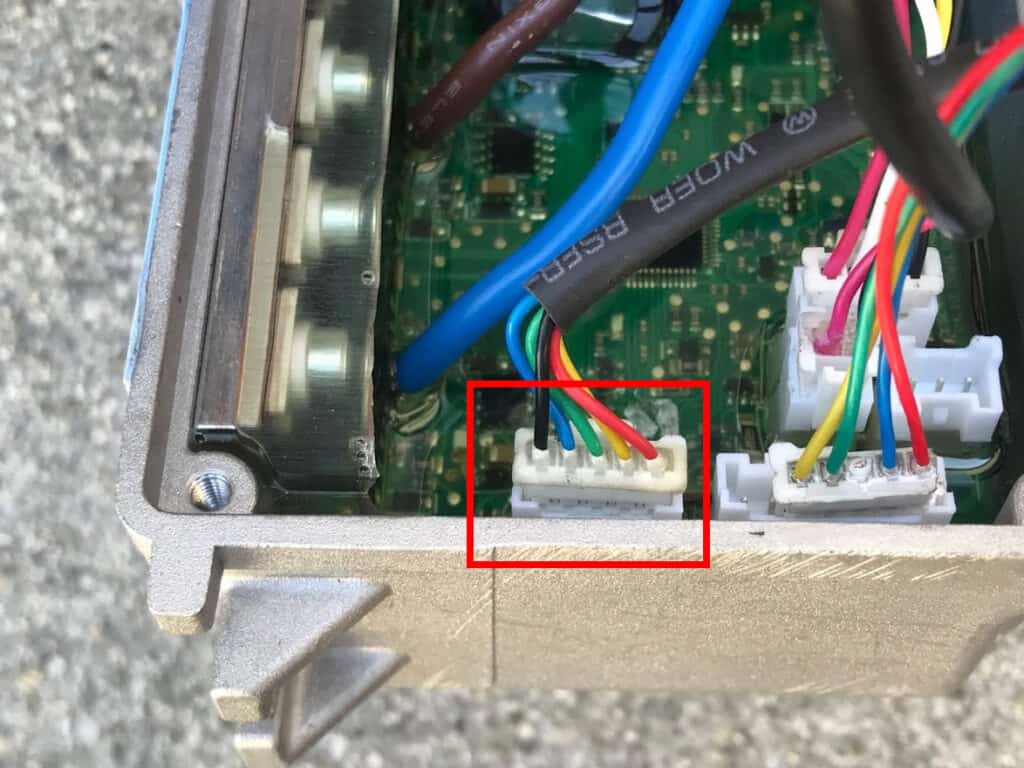
The location of the Hall sensor cable.
Remove the old motor by threading the hall sensor cable and three-phase cables back through the hold in the rear motor area.
Remove the wire guard from the old motor and snap out the plastic insert out of your old motor if your new motor does not come with one.
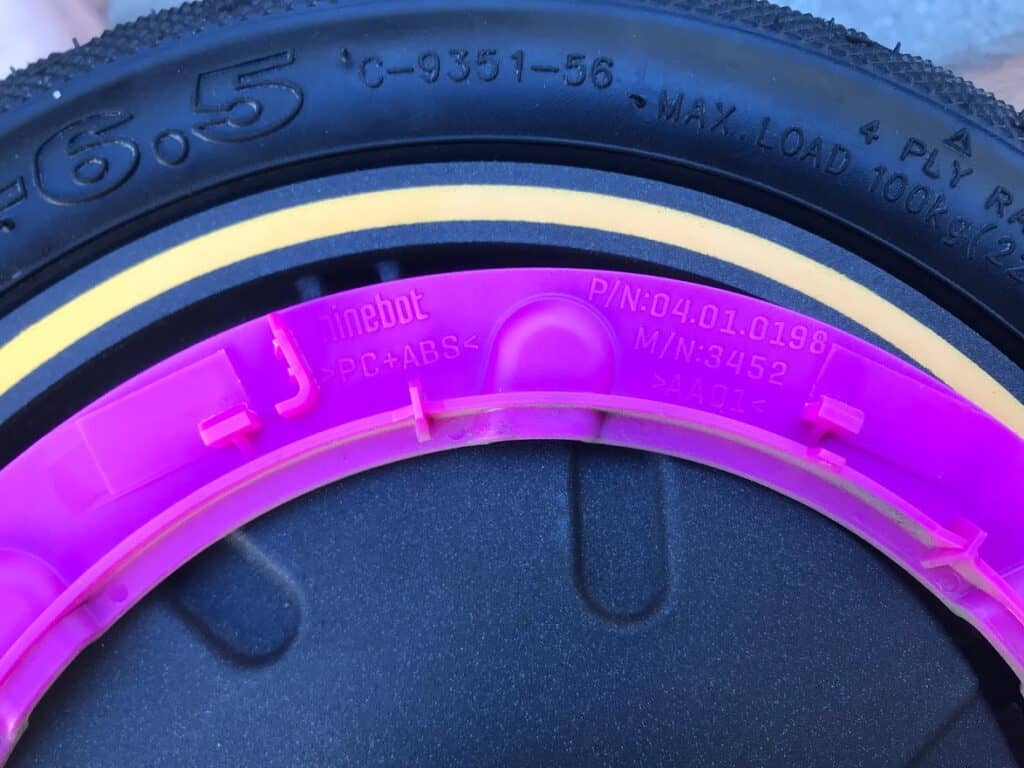
The old insert, shown here in pink.
Reassembly
Thread the wire guard through the wires and place it on the new motor.
This wire guard is not present on some models, if you do not have one, don’t worry.
Thread the wires through the hole in the motor area and set the rubber grommet in place.
Make sure this grommet is firmly in place.
Plug the 5 pin hall sensor cable back into the motor controller/ESC and then screw it back into place using the two M3 hex screws.
Push the wire guard into place and replace the two Phillips screws you removed earlier.
Push the bottom mudguard into place and replace the black Torx T25 screws.
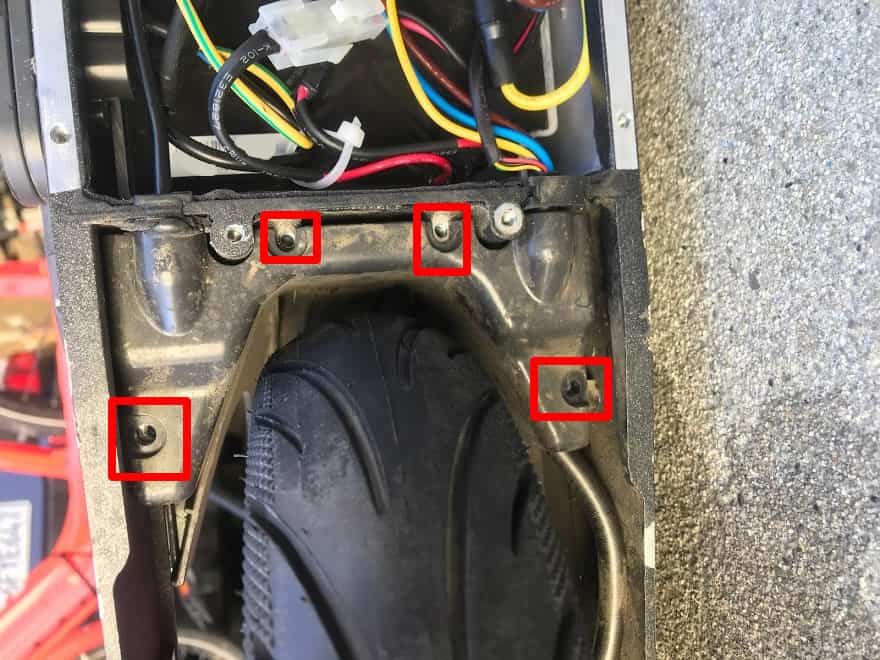
The location where the screws should be replaced.
Place the aluminum lock piece back on the hub and lightly thumb tighten the bolt on both sides.
The axle locking piece.
Do this for both sides, and then finger tighten the bolts on.
Once both bolts are somewhat tight, use an adjustable wrench to tighten them until they don’t spin anymore.
At this point, it would be wise to check everything powers up and do a quick free-wheel spin test.
If the test succeeds, continue by replacing the bottom plastic cover with its 18 screws.
- Filed to:
- Electric Scooters,
- Hardware,
- Ninebot,
- Tutorial
Comments
I did notice my control board smells like burning electronics. I unplugged everything and let it sit for a while. My speed came back and uphill climbing was back only for the first 10% of battery life. Then it slowed down from 19mph to 17mph and could barely climb a small incline. I’m thinking my control board is on its way out. New one on Segway is $90 so I’ll give a shot and report back here. I may also get a gen 2 motor but once I start adding all these mods, I’m creeping up on a new P65 lol. I like tinkering though.
Super helpful information. I have a G30 Lyft rental converted to consumer. I have about 600 miles on it now and I’ve noticed it has slowed down a bit, especially going up slight inclines. Before I pull the trigger on a gen 2 motor, I noticed you said they sacrificed torque for more speed. Should I just try and find a new gen 1 motor or have you heard anything good about the Fat Max from Max Mods? Thanks
I have a Lyft with a Gen 1 and a Lyft with a Gen 2 48v mod, both are still quite enjoyable.
The torque loss isn’t that bad with a bit of custom firmware if you don’t weigh that much, I never had issues going up hills, even before I added the 48v upgrade.
Do you happen to have a pin out for the halls on the esc and phases? I would like to retrofit a Zero 10X motor but can’t find much info about the esc.
I do not sorry, try posting on the ScooterHacking forums or discord
Thanks for the detailed instructions. Just did the procedure, and tested the new max speed. A little disappointed, I only reached about 20 mph, however, my battery is hovering around 50%, so maybe after I charge it will be faster.
I agree with you that sounds a little slow, the fully charged battery should help a bit with that but the gen 2 motors are supposed to be not as susceptible to slowing with voltage.
ive got a ninebot max gen 1 had it abour 18month just today put my gen 2 motor on prety easy to do my scooter is a bit different it doesnt have a wireguard the wire itself is reinforced . anyway i let you know how i get on
Yeah I forgot to include that some of the parts shown are rental only or only for older versions of the max
hi, i see that you have display connected to esc just with 4 wires. I will use display from f30 with 4 wires on tht esc. how should i connect? And i have 2wires for charger and es has 3 pin for it. Where should i connect it? thx
Why do you say it is not possible to go faster than 40km/h with gen2 motor? If I add 48V battery upgrade won’t it go faster?
It would then but that’s not stock
Joey! I got one of these scooters and it took me forever to get info on it. Thanks for taking the time to post this.
Glad to hear it worked! I wrote this after struggling to find anything that laid out how to do it easily and concisely so I’m glad to hear others are finding use in it too!