Wyse 5060 RAM Upgrade: Difference between revisions
Jump to navigation
Jump to search
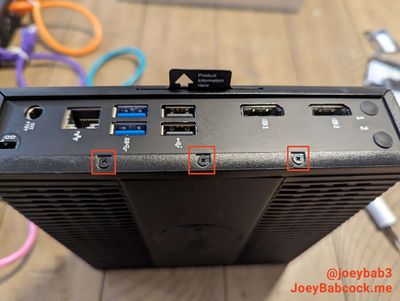
(Created page with "This page shows how to upgrade the ram on the Dell Wyse 5060/N07D. ==Dissassembly== To start, 3 screws hold the front cover in place. Use a small Phillips head screwdriver to remove them. thumb|center|400px|The 3 screws to remove. Category: Homelab") |
No edit summary |
||
| Line 6: | Line 6: | ||
[[File:DellWyse5060FrontPanelScrews.jpg|thumb|center|400px|The 3 screws to remove.]] | [[File:DellWyse5060FrontPanelScrews.jpg|thumb|center|400px|The 3 screws to remove.]] | ||
Next slide the front cover off. | |||
[[File:DellWyse5060FrontPanelRemoval.jpg|thumb|center|400px|Push down lightly and then slide the front cover off.]] | |||
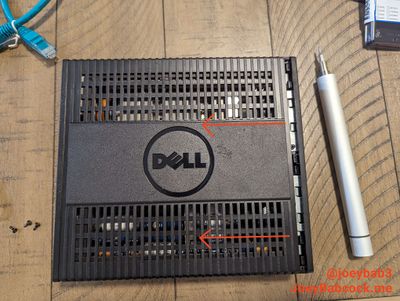
Underneath the front panel are 5 screws holding on a structural/protective cover. Remove these and slide the cover in the direction of the arrow etched on the board. | |||
[[File:DellWyse5060protectivePanelScrews.jpg|thumb|center|400px|The 5 screws to remove the protective panel.]] | |||
[[Category: Homelab]] | [[Category: Homelab]] | ||
Revision as of 03:58, 1 December 2023
This page shows how to upgrade the ram on the Dell Wyse 5060/N07D.
Dissassembly
To start, 3 screws hold the front cover in place. Use a small Phillips head screwdriver to remove them.

Next slide the front cover off.

Underneath the front panel are 5 screws holding on a structural/protective cover. Remove these and slide the cover in the direction of the arrow etched on the board.