STLink Ninebot Max ESC: Difference between revisions
| Line 26: | Line 26: | ||
[[File: NinebotMaxESCLocations.jpg|thumb|center|400px|The ESC after being removed.]] | [[File: NinebotMaxESCLocations.jpg|thumb|center|400px|The ESC after being removed.]] | ||
Carefully unplug each of the connectors. | |||
You may need to scrape more rubber potting compound away from some of the connectors in order to unplug them. | |||
===Accessing The Pins=== | ===Accessing The Pins=== | ||
Revision as of 00:05, 12 January 2022
In the case of a bricked ESC/Controller/Control Board, STLinking can save the controller from needing to be replaced in some instances.
For this process you will need:
- Windows computer
- STLink (Decent quality clones will work)
- Tools to disassemble the scooter and access the ESC
- Dupont male/female jumper cables
This process can be dangerous if done incorrectly so take caution when performing these steps and make sure you use a computer you are comfortable possibly destroying.
If you short a battery line you could end up blowing up your STLink, Computer, and more or even causing a fire.
Accessing the Debug Pins
Accessing the ESC
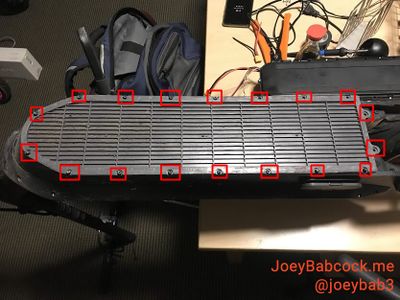
Start by removing the 18 Security Torx T-15 screws on the bottom.

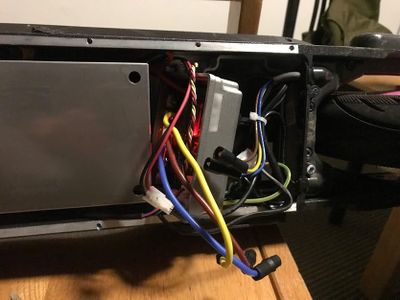
Using an M4 Allen/Hex wrench or bit, remove the two screws holding the ESC in place.

Carefully unplug each of the connectors.
You may need to scrape more rubber potting compound away from some of the connectors in order to unplug them.
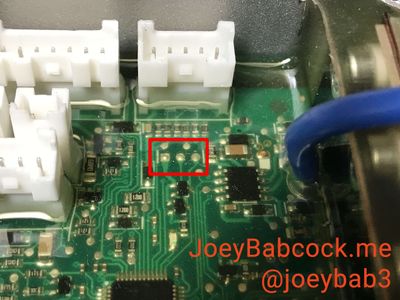
Accessing The Pins
Carefully scrape away the potting compound, making sure not to remove any of the small surface mount components.

Software
Download STM32 STLink Utility from the ST website.
Scroll down and click "Get Software" and enter your email to receive a download link.
Install it and open it.