Ninebot Max G30 Change Serial/Region: Difference between revisions
No edit summary |
|||
| (4 intermediate revisions by the same user not shown) | |||
| Line 59: | Line 59: | ||
Select your device in the menu and press "Connect". | Select your device in the menu and press "Connect". | ||
It may ask you to press the power button to pair | It may ask you to press the power button to pair; in this case, short-press the button that you would normally use to power it on or toggle the headlight. | ||
[[File:NinebotIAPSuccessfulG30VersionRead.png|thumb|center|400px|A successful connection showing version numbers.]] | [[File:NinebotIAPSuccessfulG30VersionRead.png|thumb|center|400px|A successful connection showing version numbers.]] | ||
| Line 65: | Line 65: | ||
If it shows version numbers in the "Installed Firmware" box, you have successfully connected. | If it shows version numbers in the "Installed Firmware" box, you have successfully connected. | ||
From here head to the "Tools" menu under "Utilities". | From here, head to the "Tools" menu under "Utilities". | ||
Press "Read" in the "ESC Serial Number" panel. | Press "Read" in the "ESC Serial Number" panel. | ||
| Line 77: | Line 77: | ||
[[File:NinebotIAPChangingG30Serial.png|thumb|center|400px|Changing the serial prefix from a 'D' to a 'C'.]] | [[File:NinebotIAPChangingG30Serial.png|thumb|center|400px|Changing the serial prefix from a 'D' to a 'C'.]] | ||
Press | Press "OK", then you should hear your scooter beep twice in quick succession. | ||
To confirm it has successfully changed, press | To confirm it has successfully changed, press "Read" again, and you should see your new serial. | ||
[[File: | [[File:NinebotIAPChangingG30SerialChanged.png|thumb|center|400px|A successful change.]] | ||
Test the new speed or appearance in the app, and it should be good to go. | Test the new speed or appearance in the app, and it should be good to go. | ||
===Ninebot Flasher=== | ===Ninebot Flasher=== | ||
[[File:NinebotFlasherG30SuccessfulPairing.png|thumb|center|400px|A successful pairing as indicated by the serial number reading out in the console.]] | |||
==iOS== | ==iOS== | ||
| Line 104: | Line 106: | ||
[[File: ScooterCompanionChangeScooterRegionMax.png|thumb|center|400px|The change scooter region options.]] | [[File: ScooterCompanionChangeScooterRegionMax.png|thumb|center|400px|The change scooter region options.]] | ||
To set a custom serial number, use the "Set SN" button in the section beneath the adjust scooter region section. | |||
==Android== | ==Android== | ||
===ScooterHacking Utility=== | ===ScooterHacking Utility=== | ||
===XiaoFlasher=== | |||
[[Category: Scooters]][[Category: Ninebot]] | [[Category: Scooters]][[Category: Ninebot]] | ||
Latest revision as of 19:18, 29 June 2025
Changing a serial number is the same thing as changing the region on a Ninebot Max and is required for the scooter to reach top speed.
For the ESX/SNSC 1.0 series scooters, go to Ninebot ESX Change Serial Number.
Choosing a Serial Number
A serial number should be in the format N4GXAxxxxCxxxx.
Replace X with a letter below depending on how you want the scooter to show up in the segway app.
S - G30P (30kmh)
C - G30 (25kmh)
E - G30D (20kmh)
P - G30E (25kmh)
N - G30LP (30kmh)
A - G30LE (25kmh)
O - G30LE (25kmh)
M - G30LD (20kmh)
The next two sets of xxxx can be any 4 digits.
The A and C can be any letter.
Below are two serial number examples:
N4GCA1234C1234 - G30 Regular (25kmh limit)
N4GSA2020C2020 - G30P (30kmh limit)
Windows
Ninebot IAP
Requirements
- Bluetooth LE-enabled Windows 10 PC
- Ninebot IAP 2.2.2 or above
- OEM Head Unit/Dashboard
Instructions
Ninebot IAP is an app developed by Scooterhacking.org.
Once you have it installed, open it and press the "Start scan" button.
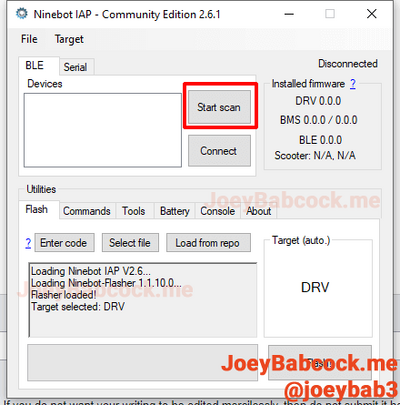
Select your device in the menu and press "Connect".
It may ask you to press the power button to pair; in this case, short-press the button that you would normally use to power it on or toggle the headlight.
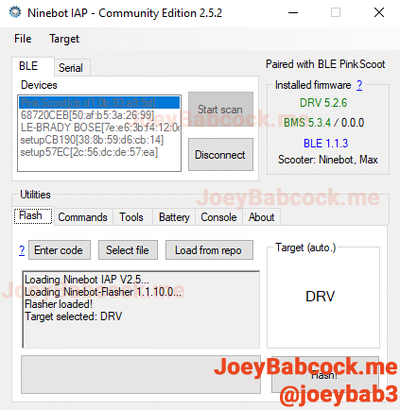
If it shows version numbers in the "Installed Firmware" box, you have successfully connected.
From here, head to the "Tools" menu under "Utilities".
Press "Read" in the "ESC Serial Number" panel.

Next, press "Change SN" and type your serial number out exactly as it was before, but change the 4th digit to the prefix you chose above.
In my case, that would be changing the D after N4G to a C if I wanted the speed to be limited to 25 kmh.
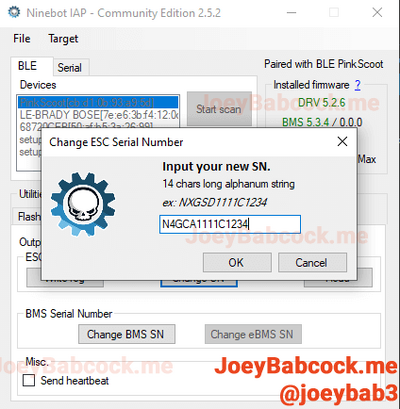
Press "OK", then you should hear your scooter beep twice in quick succession.
To confirm it has successfully changed, press "Read" again, and you should see your new serial.

Test the new speed or appearance in the app, and it should be good to go.
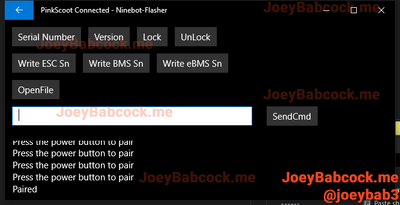
Ninebot Flasher
iOS
Scooter Companion
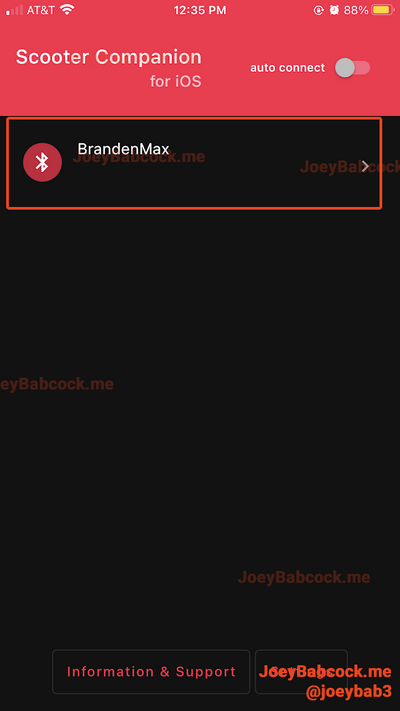
Open the app and scan for your device.
Click on the scooter that you want to perform the region change on.
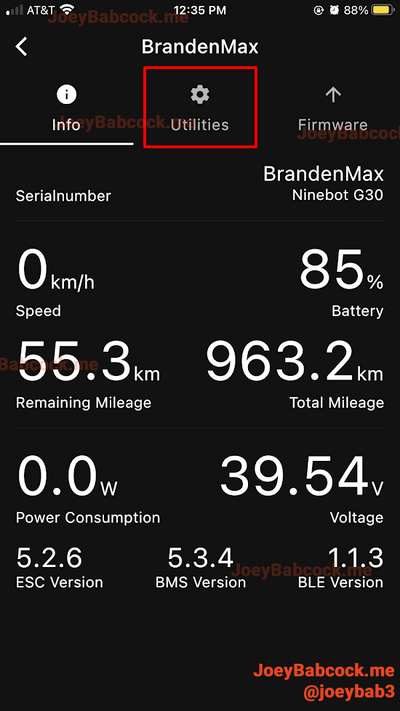
Once it connects and displays information about the scooter, click on "Utilities" on the top menu.
From here, scroll down to "Adjust scooter region" and click the region you want (US would be fastest, followed by EU, then DE).
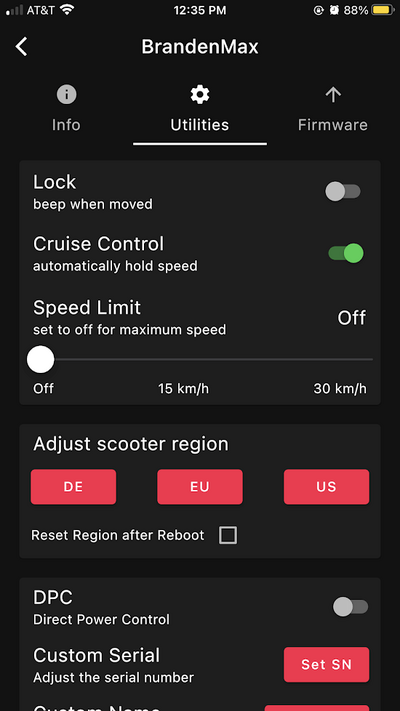
To set a custom serial number, use the "Set SN" button in the section beneath the adjust scooter region section.