Wyse 5060 SSD Upgrade: Difference between revisions
No edit summary |
No edit summary |
||
| (2 intermediate revisions by the same user not shown) | |||
| Line 1: | Line 1: | ||
This page | This page outlines the process for upgrading the SSD to a larger drive on the Dell Wyse 5060/N07D. | ||
These units often shipped with extremely small SSDs (8 GB/16 GB/32 GB). | |||
==Procedure== | ==Procedure== | ||
| Line 7: | Line 9: | ||
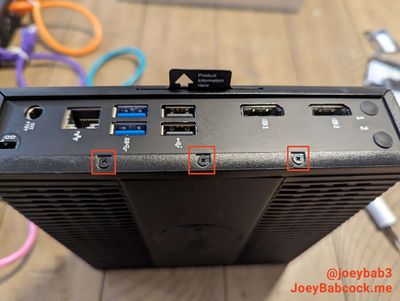
[[File:DellWyse5060FrontPanelScrews.jpg|thumb|center|400px|The 3 screws to remove.]] | [[File:DellWyse5060FrontPanelScrews.jpg|thumb|center|400px|The 3 screws to remove.]] | ||
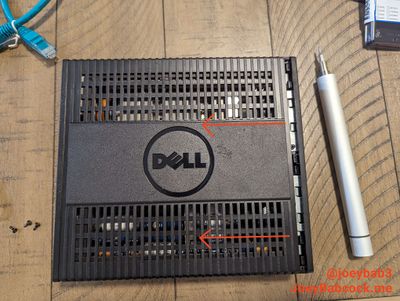
Next slide the front cover off. All screws past this point will be the same going forward. | Next, slide the front cover off. All screws past this point will be the same going forward. | ||
[[File:DellWyse5060FrontPanelRemoval.jpg|thumb|center|400px|Push down lightly and then slide the front cover off.]] | [[File:DellWyse5060FrontPanelRemoval.jpg|thumb|center|400px|Push down lightly and then slide the front cover off.]] | ||
Latest revision as of 19:39, 1 June 2025
This page outlines the process for upgrading the SSD to a larger drive on the Dell Wyse 5060/N07D.
These units often shipped with extremely small SSDs (8 GB/16 GB/32 GB).
Procedure
To start, 3 longer screws hold the front cover in place. Use a small Phillips head screwdriver to remove them.

Next, slide the front cover off. All screws past this point will be the same going forward.

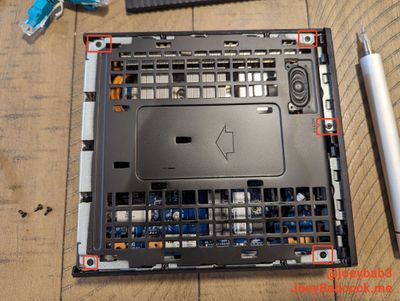
Underneath the front panel are 5 screws holding on a structural/protective cover. Remove these and slide the cover in the direction of the arrow etched on the board.

Once the panel is removed, you can unplug the attached speaker to fully remove it or set the panel aside.
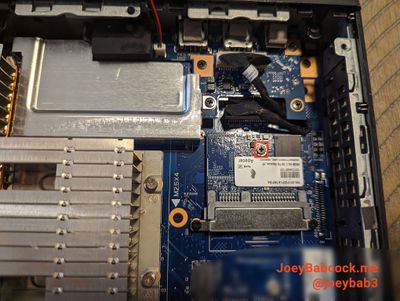
Only one screw holds the SSD in place, once that is removed the SSD can be slid out.

I use a SATA power+data extension cable to attach a full-size 2.5" SSD.